


找房a+软件
95.75MB · 2025-12-16

Apple在Xcode16下推出了人工智能产品Swift Assist以及预测性代码补齐(Predictive Code Completion)。 但是Swift Assist一直没上线。而预测性代码补齐(Predictive Code Completion)又锁国区。在vscode各种AI插件各种浪的当下,Xcode苦AI久矣!
这次介绍一下一个非常牛逼的xcode插件,给我们带来了AI辅助。他就是CopilotForXcode。CopilotForXcode的readme写的是Copilot for Xcode is an Xcode Source Editor Extension that provides GitHub Copilot, Codeium and ChatGPT support for Xcode.
而今天我们的核心目的是基于CopilotForXcode插件的能力让Xcode集成deepseek。
Xcode直接集成deepseek的优点在于可以直接传递代码的上下文,省却了从网页来回搬运代码的问题。并且可以直接在代码中体现deepseek的修改建议,一键accept。最后他的回答的质量还是可以的。
缺点就是费API token,要充值,但这个不是最大的问题。最败体验的是撸完码,抬起手要等3秒才能回来一个建议,速度太慢了。
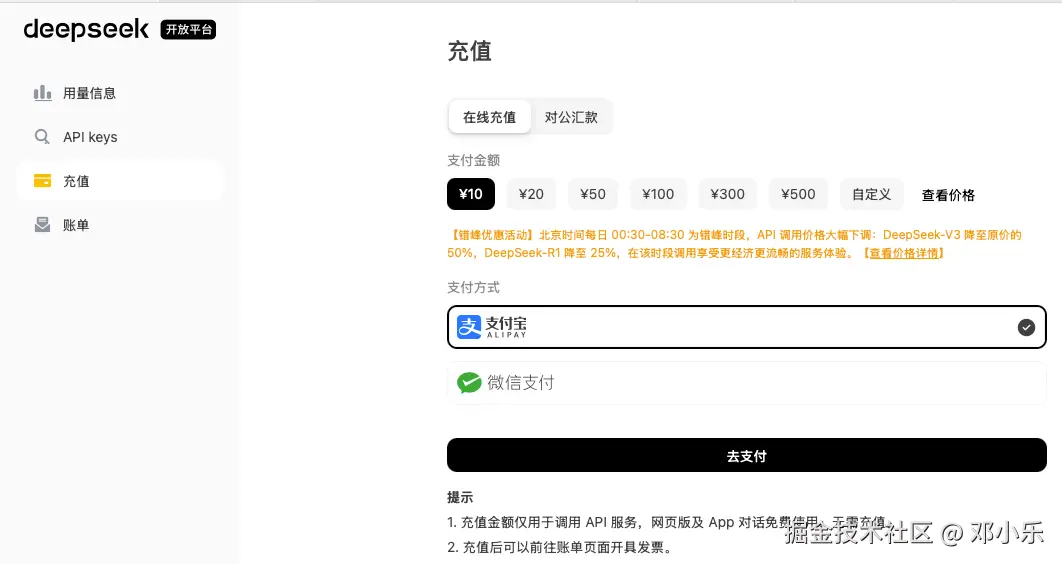
打开deepseek开放平台。接着手机验证码一键登录或者微信扫一扫
页面的左侧有一个最醒目的黄色的按钮叫做充值,想用就充值吧,不充不让用,充了才能变强。最小金额好像是10块钱。
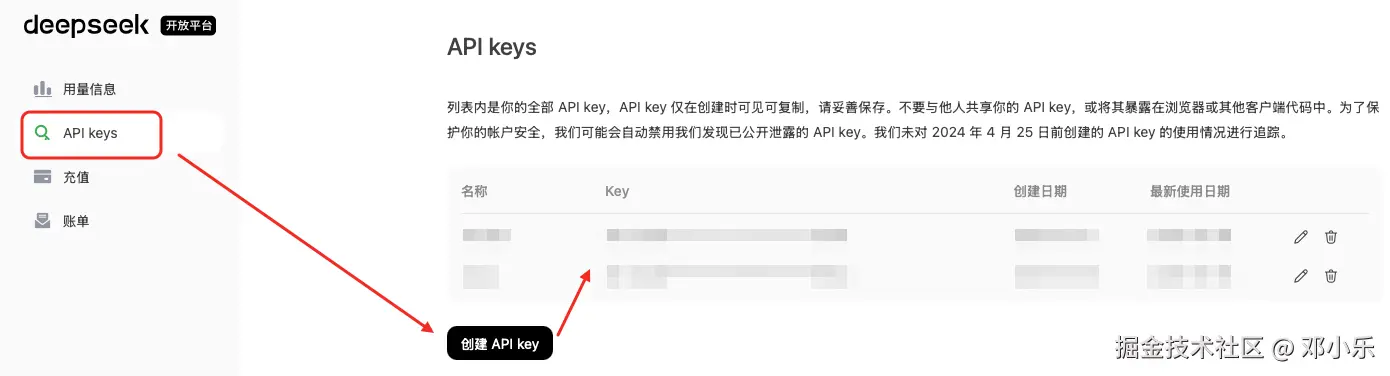
CopilotForXcode插件的链接是github.com/intitni/Cop… 下载安装方式有多种,项目的readme里面都有介绍。我平时有使用homebrew,我就直接用方式二brew命令安装了。 下载完后就长这个样子
直接打开网站下载它最新的release版本Copilot.for.Xcode.app.zip,然后解压丢到Mac的Applications文件夹内,一气呵成。
brew install --cask copilot-for-xcode
下载完毕后,丢到应用程序文件夹(Applications)内直接打开程序。就会提示获取权限,一路允许就对了。 需要注意的点:
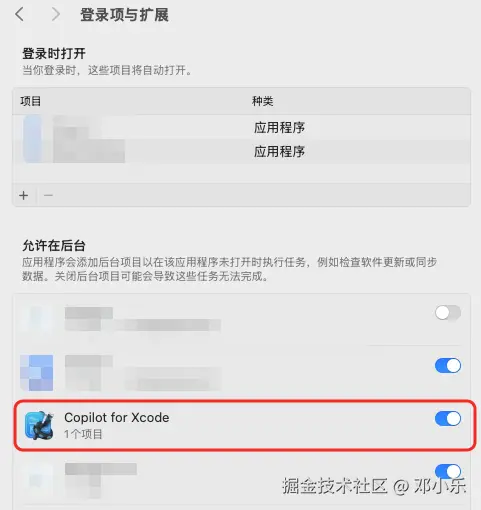
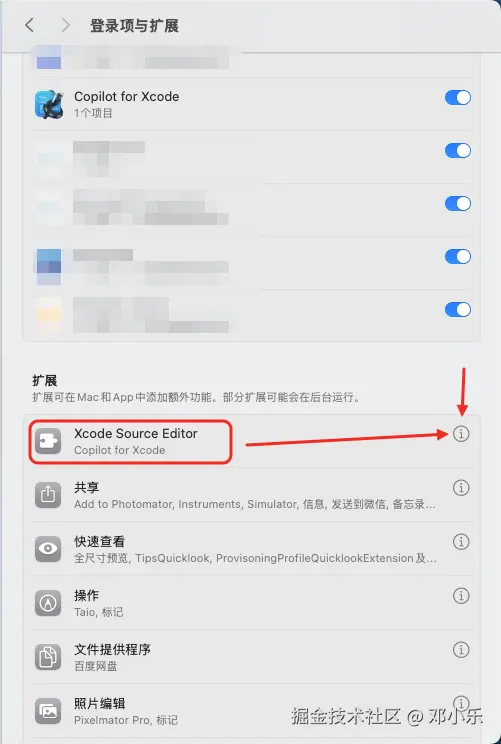
系统设置-通用-登录项与扩展。有一个允许在后台的Toggle开关记得打开。
还是系统设置-通用-登录项与扩展。在允许在后台设置区域的下方还有一个设置扩展区域。注意点击箭头所示区域,有一个弹层,再把Copilot for Xcode的开关打开。
如果是MacOS14,设置扩展的位置有点不太一样。在系统设置-隐私与安全下面。下面是人家官方的文档,写的比我的详细
#### macOS 15
From the Apple menu located in the top-left corner of your screen click `System Settings`. Navigate to `General` then `Login Items & Extensions`. Click `Xcode Source Editor` and tick `Copilot for Xcode`.

#### MacOS 14
From the Apple menu located in the top-left corner of your screen click `System Settings`. Navigate to `Privacy & Security` then toward the bottom click `Extensions`. Click `Xcode Source Editor` and tick `Copilot`.

#### Older Versions
If you are using macOS Monterey, enter the `Extensions` menu in `System Preferences.app` with its dedicated icon.

### Granting Permissions to the App

The first time the app is open and command run, the extension will ask for the necessary permissions.

Alternatively, you may manually grant the required permissions by navigating to the `Privacy & Security` tab in the `System Settings.app`.

- To grant permissions for the Accessibility API, click `Accessibility`, and drag `CopilotForXcodeExtensionService.app` to the list. You can locate the extension app by clicking `Reveal Extension App in Finder` in the host app.
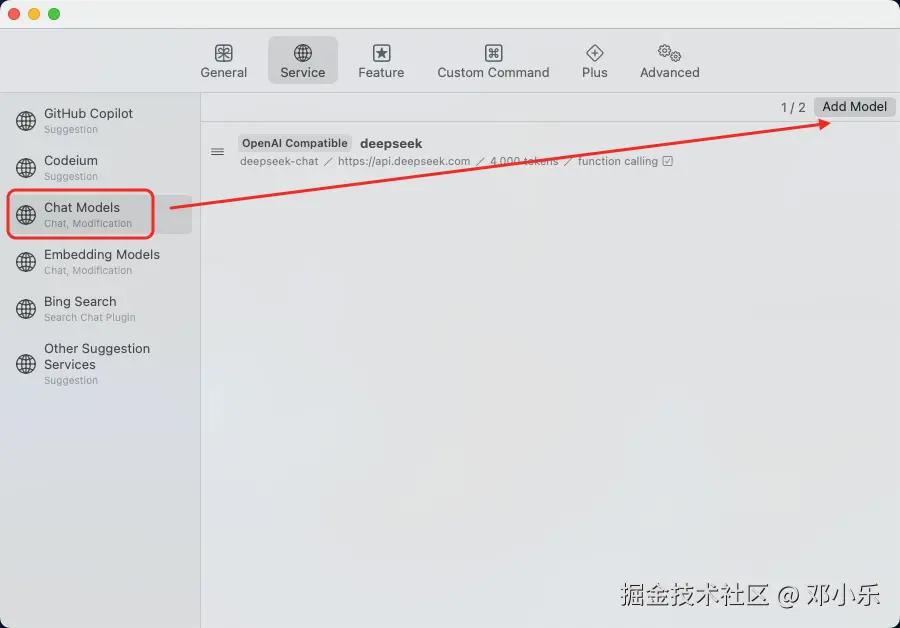
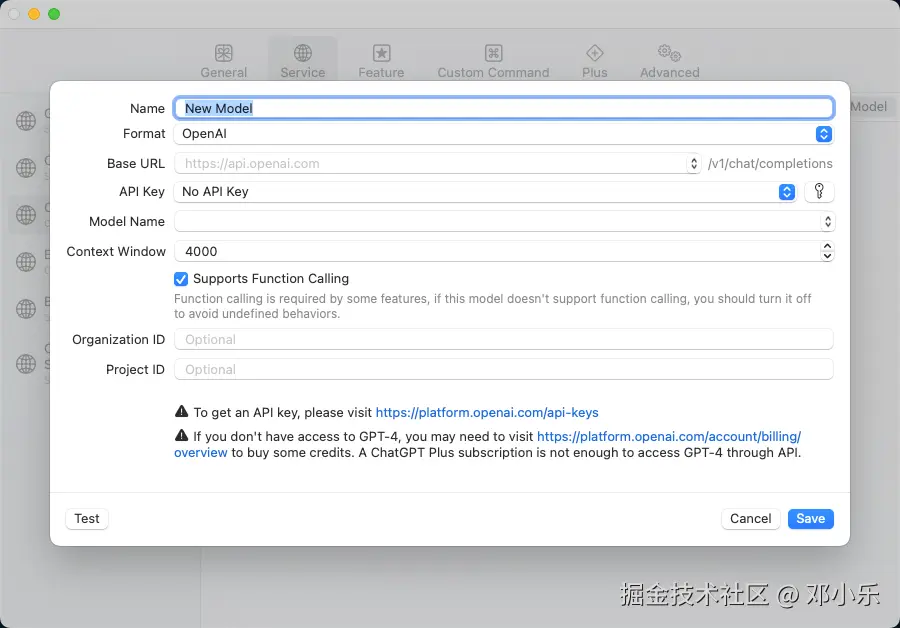
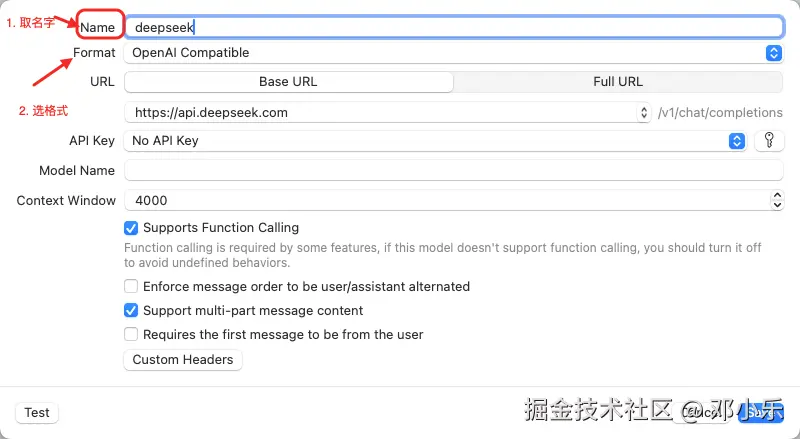
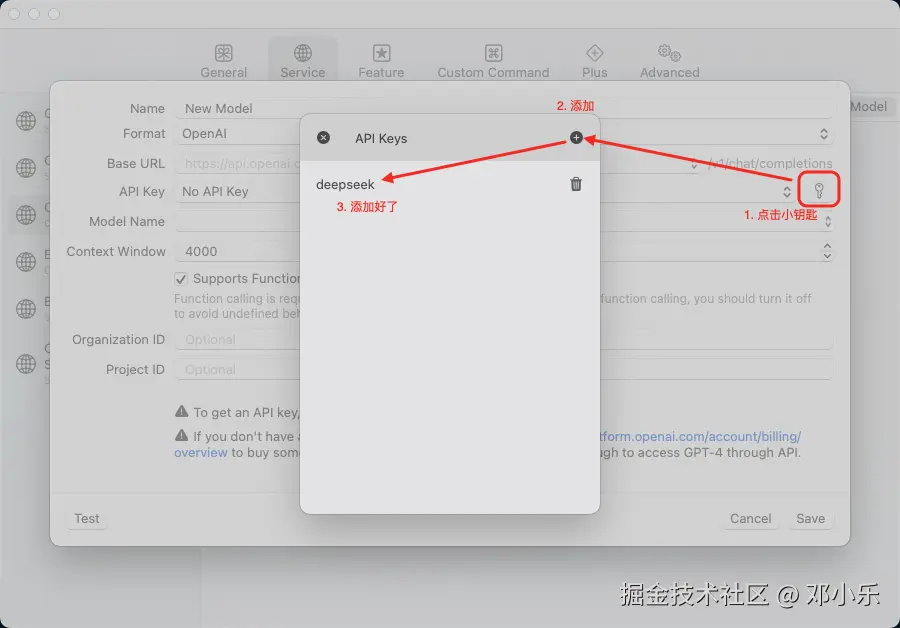
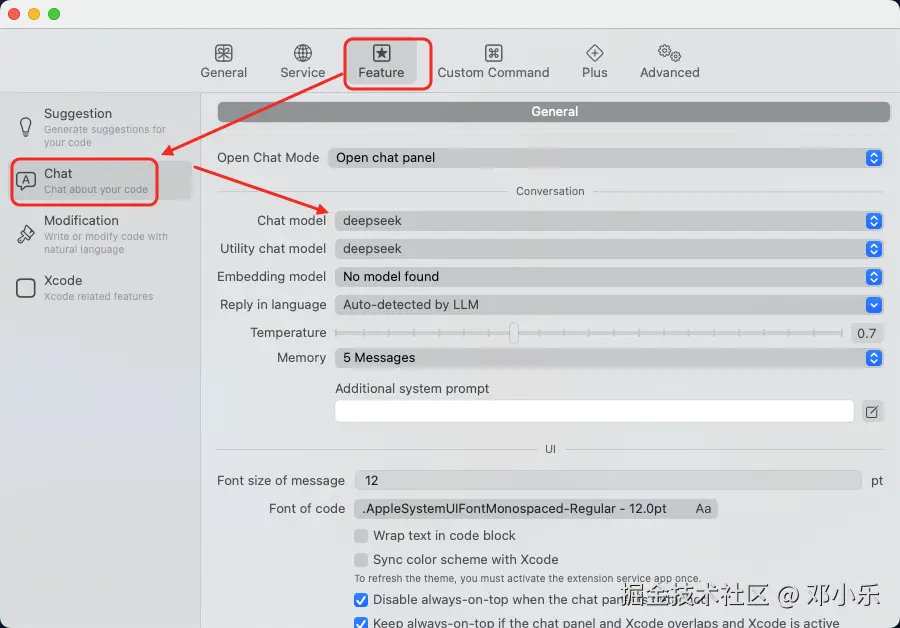
点击后弹层长这个样子
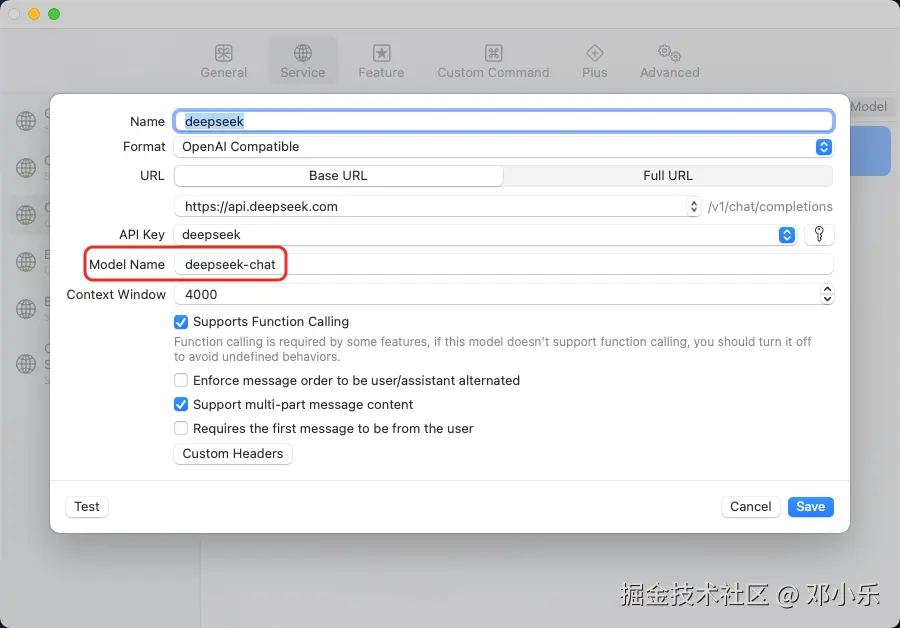
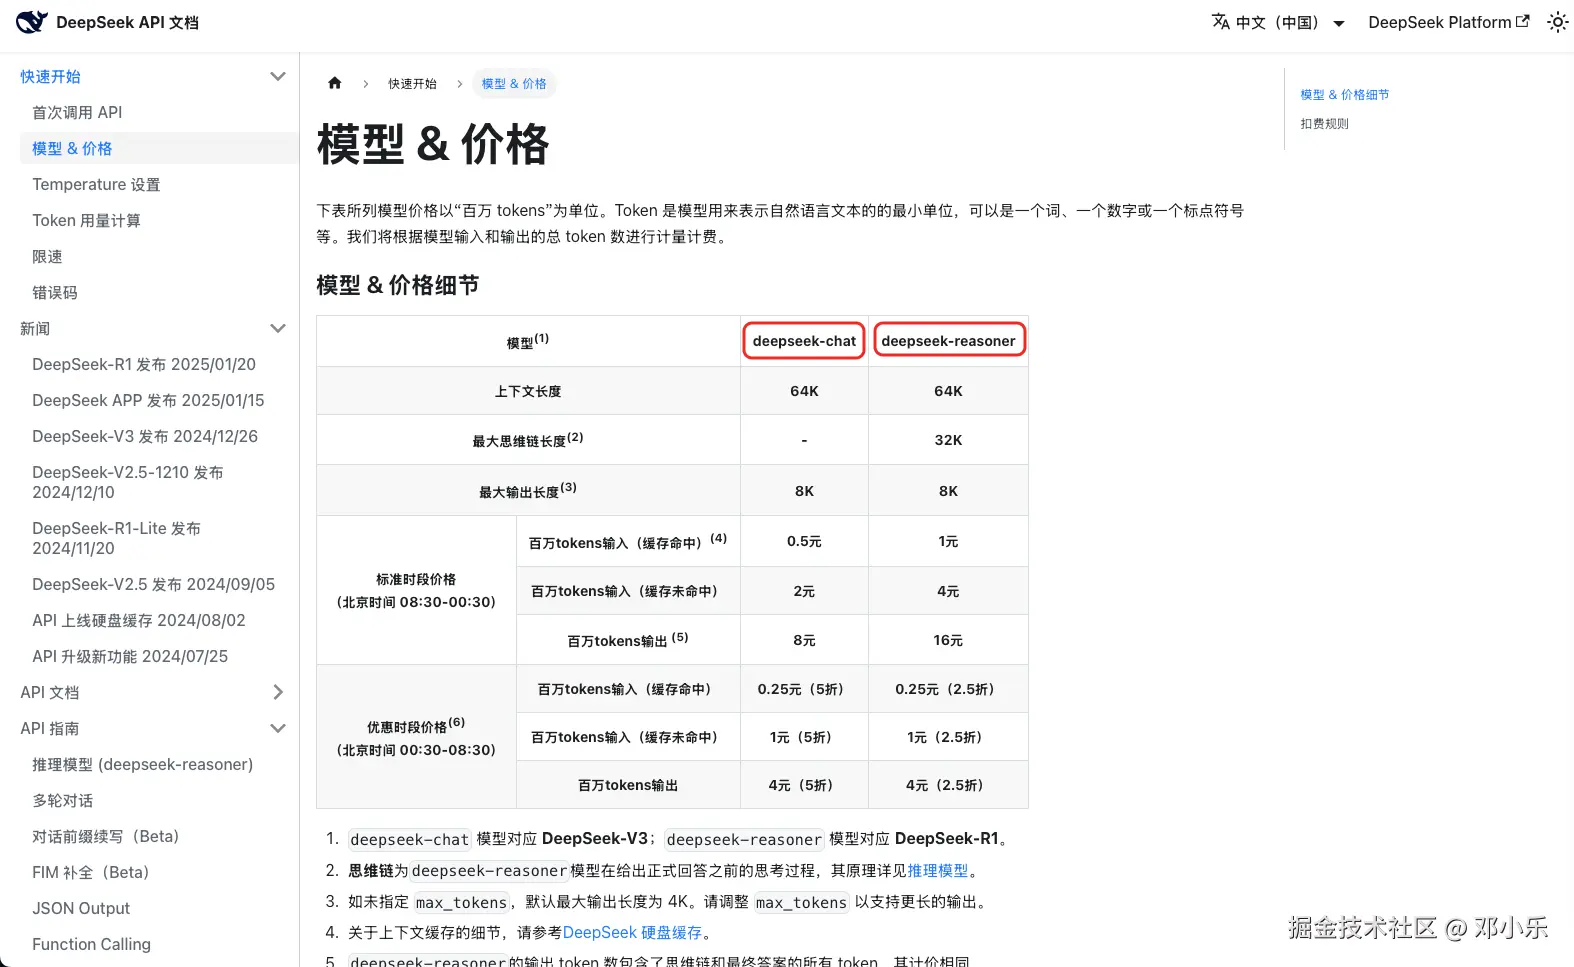
deepseek-chat就可以了,这里千万别乱填。这个是网络请求的参数,告诉deepseek那边使用哪个模型处理数据,不是随便取名字的。之后直接点击右下角的save就OK了。当前的deepseek只有2个模型可以选择
可以看文档 api-docs.deepseek.com/zh-cn/quick…
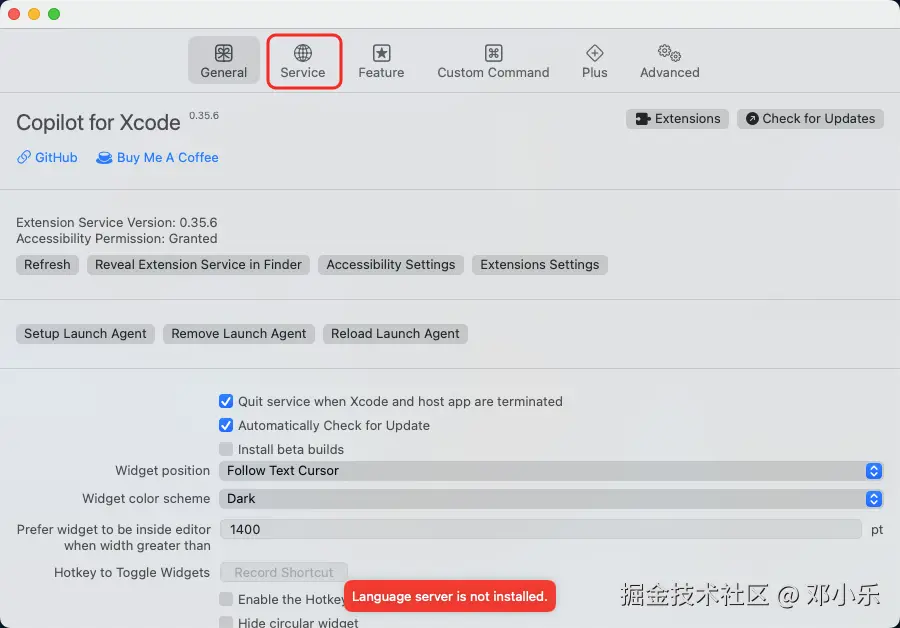
到此,我们的chat差不多就配置好了
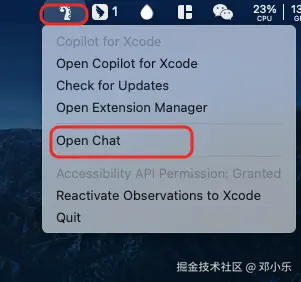
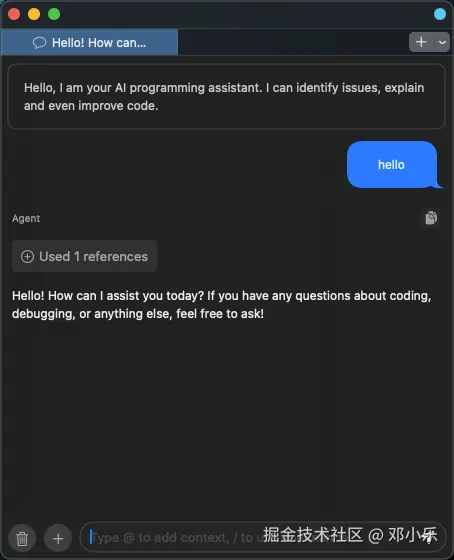
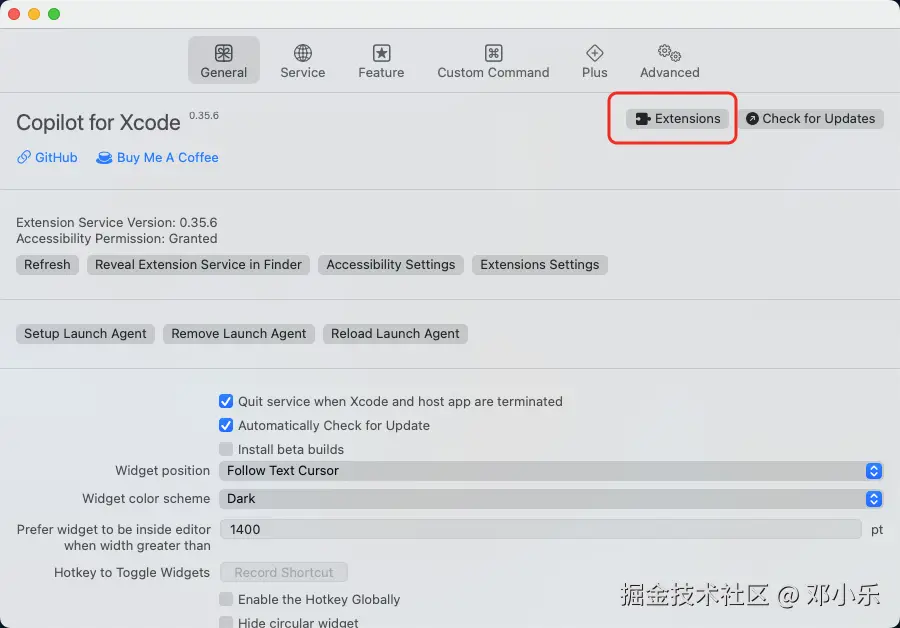
插件配置好了后,顶部menubar可以看到一个小触手。那就是插件的快捷入口,点击后有一个open chat的按钮。我们接下来就可以开始聊天了
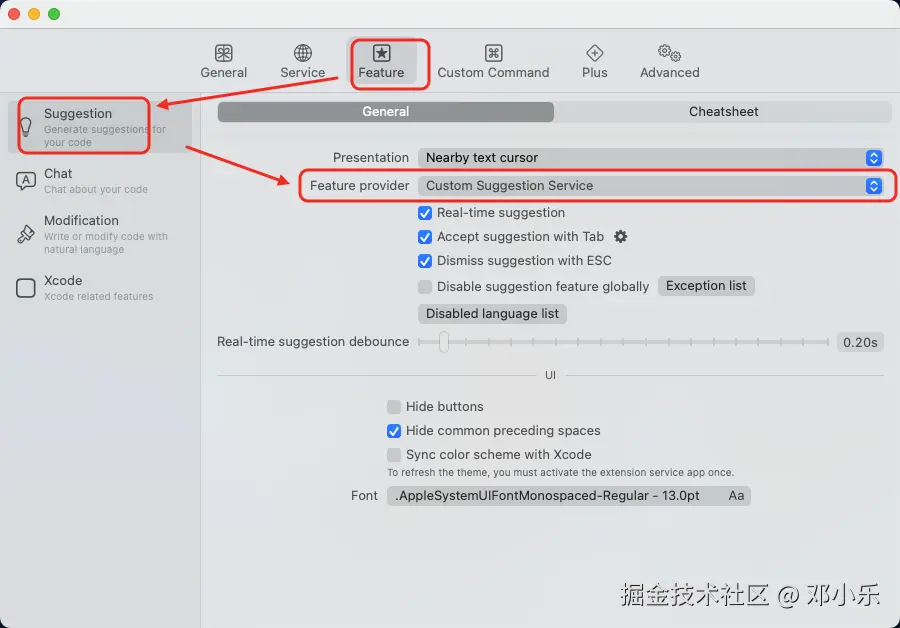
现在我们还需要处理代码建议,也就是自动补全。也是这位作者名下的另外一个库。叫做CustomSuggestionServiceForCopilotForXcode,我们接下来基于这个库来实现deepseek的FIM补全功能。api-docs.deepseek.com/zh-cn/guide…
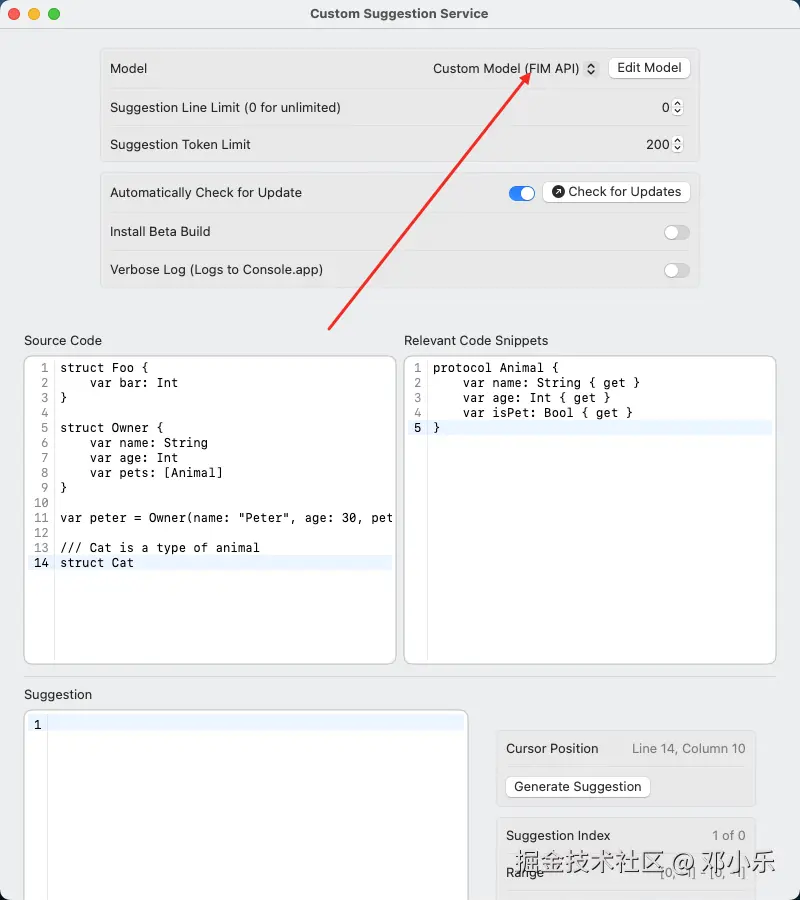
CustomSuggestionServiceForCopilotForXcode的下载地址是github.com/intitni/Cus… 打开后直接去release页面下载它的最新的Custom.Suggestion.Service.app.zip 解压后我直接丢应用文件夹(Applications)了。
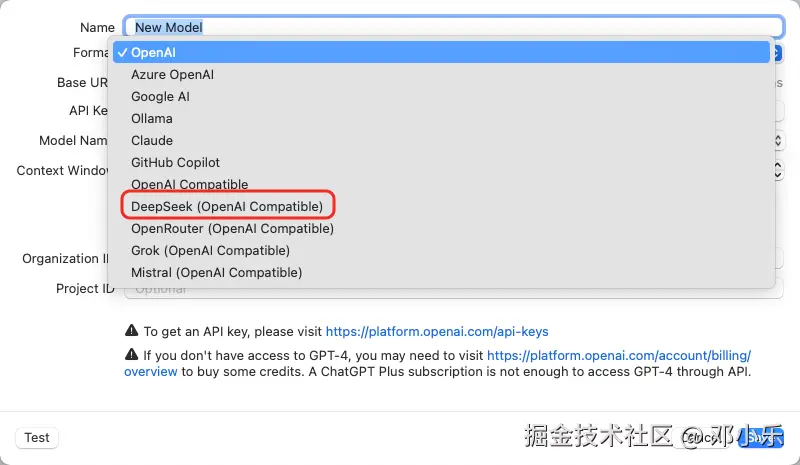
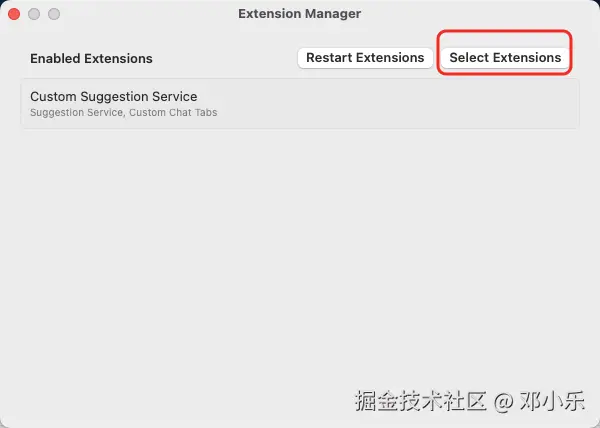
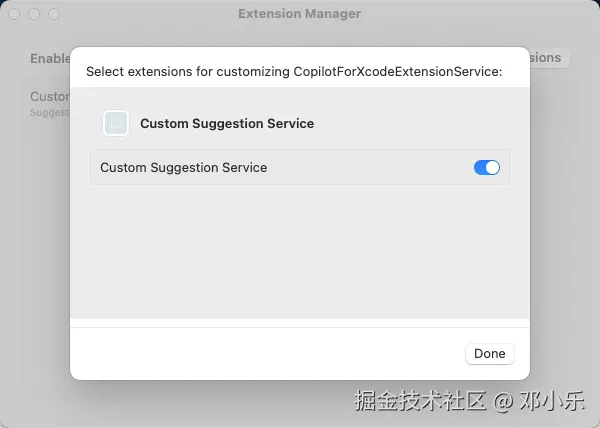
如图选择
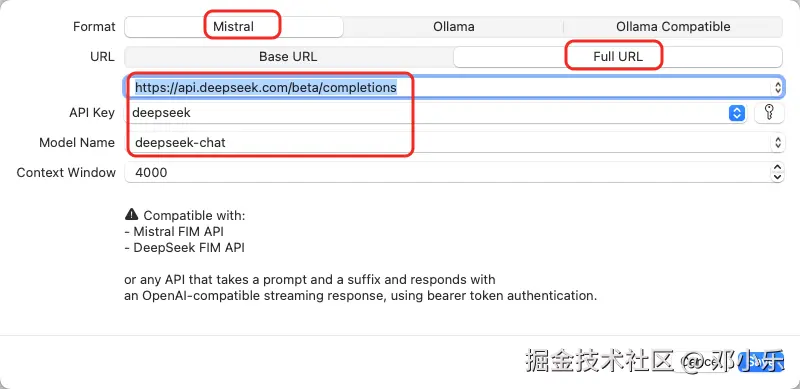
https://api.deep**s*eek.com/beta/completions url的出处参考的是deepseek官方文档api-docs.deepseek.com/zh-cn/api/c…deepseek-chat
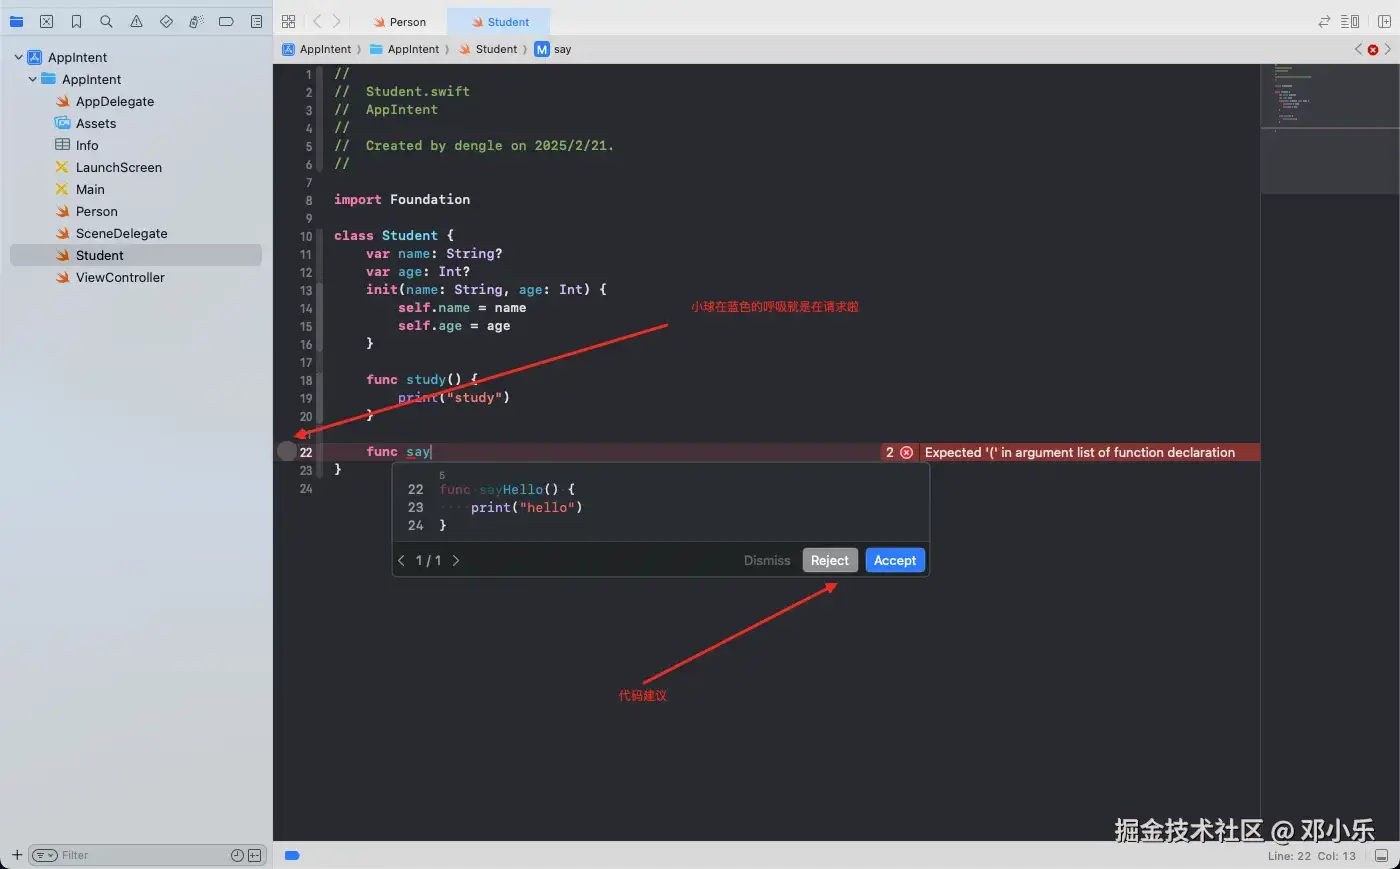
最后配置完成。可以安安静静地享受AI编程的愉快了。附上提示代码图如下:

